Maybe you have a drone but are not sure where to take your drone for a great aerial photo shoot. It can seem like you will need to travel somewhere beautiful to capture awesome photos such as the stuff you may see on television. In this post, we let you know that it is not true and provide you with several easy tips for shooting with your drone.
Planning may be among the main things when it comes to choosing the aerial pictures you desire. Map out the area out completely and plan times and days to take your aerial photos or video.
But how do we find a fantastic location for shooting aerial photographs?
Idea/Concept
Every time you plan to shoot something, it needs to have some meaning. You may be interested in the place, an idea, a concept, or something you just feel the need to make. During the aerial photo shoot, things like water, textures, railroads, seasons, tennis courts and so many different items can catch someone’s attention.
Weather Impacts Aerial Photos
Weather is absolutely crucial to check. This could make or break the photo expedition, and if you travel a good distance just to learn that you can not fly, you might be pretty disappointed. Bear in mind, this is 100% your accountability since all you had to do was check the weather.
Take a quick look at the location that you would like to travel to, as the weather in that location could be different than the weather you’re in. If the weather is poor and you know it can be too risky to fly, please change it.
Shooting with your drone in poor weather can be tempting, but losing your drone isn’t an enjoyable thing, especially once you know you did not need to be flying into the conditions you’re in. Always better to be safe than regret, so use your best judgment before heading out to fly.
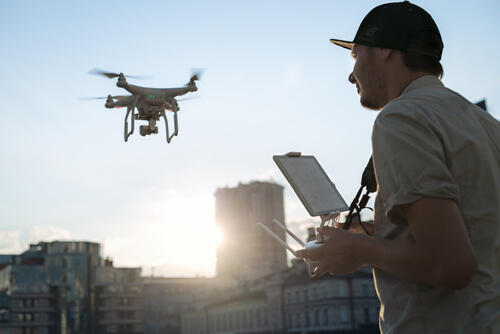
Check The Airspace
It is essential to adhere to the rules when flying. Based on what you’re doing and the urgency of this, you can work around these things legally, but if you’re going out to fly by yourself and do not want any trouble, just be sure you’re in the clear.
A couple of excellent apps to check out would be the FAA’s B4UFLy app, Kitty Hawk, and UASideKick, but many others out there that assist drone pilots in knowing where they cannot fly during an aerial photo shoot.
14 Tips For Your Next Aerial Photo Shoot
One of the challenges that photographers usually face is finding the ideal location to meet their theme or inspiration. In this electronic era, the challenge of finding the perfect spot had become a whole lot simpler than when people had to drive around until they found something they enjoy.
By just going on your phone and typing in a few key phrases, you will be amazed about what is out there waiting for you. In this report, we’ll be exploring several tips that should help you find the proper place to fly for a beautiful aerial photo shoot.
1. Pinterest
The Pinterest app or site is an excellent tool for finding inspiration, ideas, and perfect places. It functions as a digital search engine and can advocate tips or ideas based on your personal taste. We can confidently say that Pinterest can help you through many photography sessions and be a tool on shoots to find inspiration.
So if you’re thinking about disappearing into the clouds to catch a few shots of down under, run a quick search on Pinterest before you reserve your flight. Be sure that you use keywords to get your point across precisely what you’re searching for, as Pinterest can go off-topic from time to time.
2. Google Earth
The Google Earth app or feature was something around for several years. Besides stalking or trying to find some instructions, Google Earth may be utilized in several other creative ways. Using satellite imagery, google earth practically lets you digitally fly anywhere. It offers you updated, detailed imagery of any place entered into its search bar or some other place you direct it.
Well, google earth offers excellent aerial shots of any place, and because of this, it’s more than capable of providing you a preview of any place you would like to see. If you are thinking about shooting a location that you are not overly familiar with, conduct a quick check through google earth to see what it is like and get familiar with it, so you’ve got some idea about where you are going. Google Earth provides you all you will need to find a place not from just an aerial view but also from the ground.
3. Use Instagram
Nowadays, everybody has Instagram, but not everyone uses it for the correct reasons or to its full potential. This is surprising since we often spend as much time on the phone. Instagram also allows us to search for a specific location through its search bar or places near your present one.
As soon as you’ve chosen or entered a place, it brings up images labeled with that place from users worldwide. This then provides you the freedom to look through as many profiles as you like to get an idea of some terrific places to match your ideas. This suggestion had also saved me several times before after looking through several profiles.
4. Explore
Great locations will not always be posted on social platforms or even observable via google earth. You might need to attempt to explore a few times to get some hidden treasures on your location.
When you have time on the weekend or even on vacations, dedicate some free time to your craft and take an aerial photo shoot into a few places outside.
5. Take Notes
The human brain can recall so much and no more, especially when it comes to places. Be sure to have a small notebook or notepad available when trying hoping to find locations.
Following a day of scouting, reconsider your notes to find out how many places you’re interested in so far and then try to create time to do a bit more research on each or, if at all possible, pay them a visit.
6. Research
Speaking of research, it is great to get some general information regarding the area you are venturing into for many reasons. Generally, when moving into unfamiliar territory, you need to try to cover all your bases in case of an unfortunate event like an emergency landing or even worse.
Keep in mind, it is not merely a drone that you could control from the floor but instead you thousands of feet in the sky flying over unknown terrain. Knowledge is power, and it is always better to be safe and prepared than sorry and unsure about what you will need to do.
7. Make Something Out of Nothing
When flying over what might first appear to be a dull, monotonous landscape, start looking for something out of place from the scene. Make this the picture’s subject and set it in one of those next intersecting points (thirds rule). You may accentuate the colors in post-processing to improve its presence in a final abstract picture.
8. Fly Your Drone Even If You Don’t Think There Is Any Point
Never think that because a scene or object doesn’t seem good at ground level, it will look equally poor in the air. Most man-made arenas and structures are designed and drawn in plan form.
They generally have pleasing aesthetic qualities or have strong geometric shapes and patterns. Regardless of what you noticed from ground level, power up the drone, and look at it.
9. Learn to Fly in ATTI Mode
On occasions, the drone will lose the GPS signal, and the aircraft will automatically change to ATTI mode. This can be very alerting and unsettling once the ground station declares the fault, along with warning bleeps! If the drone has been flown in windy conditions, the craft cannot hold its position and will begin to drift with the wind.
Being able to rapidly adapt to the requirements will prevent crashes and potential fly-aways. In an ATTI mode, the drone will stay stabilized and will lock flight elevation accurately. Some drones may create more power output and speed in ATTI mode, so this performance benefit can be utilized when required. As the drone appears for satellites on the horizon, hills, mountains, and tall buildings can attenuate the signal, so understanding how to operate in ATTI mode will let you still fly the drone unguided by GPS.
10. Pan With the Drone to Produce High Megapixel Images
By current standards, nearly all camera drones available now have a relatively low megapixel count than their own SLR and CSC counterparts. This can lead to a loss of detail and limit how large you can print your pictures. One solution to overcome this dilemma may be to fly over your topic in a coordinated pattern and have a series of shots, easily stitched together in software programs like Adobe Lightroom.
There may be events when shooting a subject at the maximum legal height (in the UK) of 400ft might not be high enough to capture the entire scene; shooting a series of shots will solve this situation.
11. Think Ahead and Pick How to Process the Scene Afterwards
Despite a close and thorough review of weather reports, the terms are often not what we anticipated once we get to a place. However, do not let this put you off! Try and think about how you can process the picture to create atmosphere and mood. Use the dodge and burn tool to add light and color to create a foreboding image. Including a strong vignette into the framework will keep the eye inside the framework and, much like the picture below, generate a feeling of enclosure.
12. Pay Attention to the Forecast
UAV Forecast supplies drone pilots with the necessary information to safely fly their drones in specified time intervals. It reveals airports and restricted locations, weather forecasts, estimated GPS satellites available, and something that not many individuals know, the Kp index.
The Kp index measures the geomagnetic disruption of solar activity, on a scale from 0 (calm) to 9 (major storm). Anything at or under 3 or 4 is generally safe for flying. The greater the Kp index, the more likely you will have problems getting an accurate GPS lock. The effects also vary; seldom, everything will be OK, while at other times, you will lose lock entirely for a couple of seconds or perhaps a moment or appear to have a lock. Still, the position will, in fact, be incorrect by hundreds of meters. During these conditions, it might be a better idea to try to photograph the aurora instead?!
13. Use The Thirds Grid Overlay to Write Your Shot
It’s ideal to find the composition correct in the camera with low Megapixel sensors once you take the shot to prevent unnecessary cropping. If you rely on fixing the composition by rotating and cropping the image in post-processing, you may lose precious pixels. If your ground station app can demonstrate the thirds grid, use it to help in your composition. The overlay grid is also an essential guide to getting your shots right!
14. Try To Maintain the ISO at 100
Small sensors do not work well at high ISO speeds — mainly the sensors in DJI’s Phantom 3 range. An ISO over 100 can introduce plenty of unwanted sounds. In light wind conditions, optimizing the shutter speed as low as 1/6th of a second to use an ISO of 100 can produce a sharp motion-free picture. But be sure that you take many frames to increase your odds of a sharp shot.
Conclusion
Go crazy with your map! Google literally offers you a perfect idea of what to expect when you go outside to take aerial photos. Going on an aerial photo shoot with your drone will become more than merely driving somewhere and winging it.
The more you fly, the more practice you have, the more you create, the better off you are. You’ll discover your style and begin to make content, which means something to you.
Safe flying to everyone out there, and we hope this information and tips help you out.